
Bridging ERC-20 Coins to a New Crypto Network on MetaMask
GM Staff Writer
Published: 4 April, 2024
Crypto is a rapidly-developing industry that can often be hard to navigate, when the space moves as fast as it does. New chains and coins are emerging all the time, and knowing how to move between them can be beneficial to your crypto-journey.
With GM.co going Multi-Chain, we have prepared a step-by-step guide to help you bridge your ERC-20 coins to a new crypto network, on MetaMask.
Step 1: Adding a New Network (or “Chain”) on MetaMask
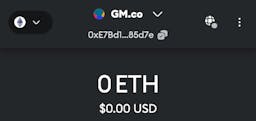
1.1. Open your MetaMask extension or app and ensure you're logged in.
1.2. Click on the network icon in the top left corner and select "Add Network".
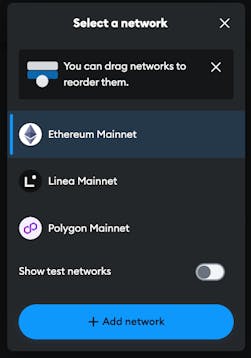
1.3. Follow the prompts in your browser to find and add a new network. Currently, GM.co supports Polygon, Binance Smart Chain, Avalanche, and Arbitrum One. In this example, we are adding the Binance Smart Chain network.

1.4. Once created, switch your MetaMask network to the one you've just added. You can use the browser prompt, or you can also toggle between chains in the extension by clicking on the network Icon.


Step 2: Sending ERC-20 Coins to the New Wallet
2.1. In your MetaMask wallet, copy your wallet address.

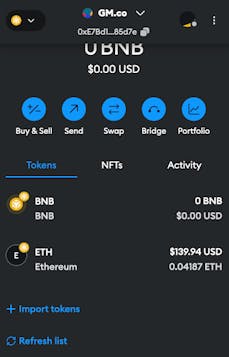
2.2. From an exchange, you can send your ERC-20 tokens to your new MetaMask wallet address. Check that the new network you added supports the ERC-20 token you wish to send, and check that the exchange you are using is able to send using that network! In this example, we are sending ETH to our BNB Smart Chain wallet on MetaMask, using the BEP20 network.

2.3. Enter the amount of ERC-20 tokens you want to transfer and double-check the recipient address before confirming your transaction.
2.4. Wait for the transaction to be confirmed. Once confirmed, the ERC-20 tokens will appear in your new wallet on the designated chain.
2.5. If the token does not appear in your MetaMask wallet, simply use the “refresh list” or “import token” function. In this example, we manually added the new token contract 0x2170Ed0880ac9A755fd29B2688956BD959F933F8. Now you can see your token sitting in your wallet.
Step 3: Sending Native Tokens for Gas Costs
3.1. To cover gas costs on the new network, you'll need some native tokens of that network (e.g. MATIC for Polygon, BNB for Binance Smart Chain, etc.)
3.2. From your exchange, you can purchase and send the native token to your new MetaMask wallet, once again ensuring that you are using the correct network. In this example, we are sending BNB using the BEP20 network.

3.3. Once the transaction is confirmed, the native tokens will be sent to your new wallet, allowing you to cover gas-costs for future transactions on that network.

Congratulations! You've successfully bridged ERC-20 coins to a new crypto chain on MetaMask and are ready to explore the functionalities of the new network.